Using GitOps has immense benefits in terms of security and having configuration of code using Git makes it easy to revert changes and see the history of a kubernetes cluster´s configuration.
Install flux using bash
curl -s https://fluxcd.io/install.sh | sudo bash
Also see https://fluxcd.io/flux/installation/
You can run flux -v to check whether flux is properly installed.
Using GitHub to bootstrap flux
FluxCD is cabable to support any git repository. GitHub, GitLab, Bitbucket and any other generic Git Repository are supported.
Also see: https://fluxcd.io/flux/installation/bootstrap/
Since I am used to GitHub and so far its the most popular Git service, I´ll be using GitHub here.
Creating a Personal Access Token
FluxCD needs a PAT to do the bootstrapping with GitHub. It can be created by going to the settings section in your GitHub profile. In the settings sections you can scroll down to the "<> Developer settings". And then you can go to "Personal access tokens" > Tokens(classic) or simply use this link: https://github.com/settings/tokens
Then you can hit the "Generate new token" button and click on "Generate new Token(classic)".
As note you can add FluxCD-Example and check the repo scope like this:
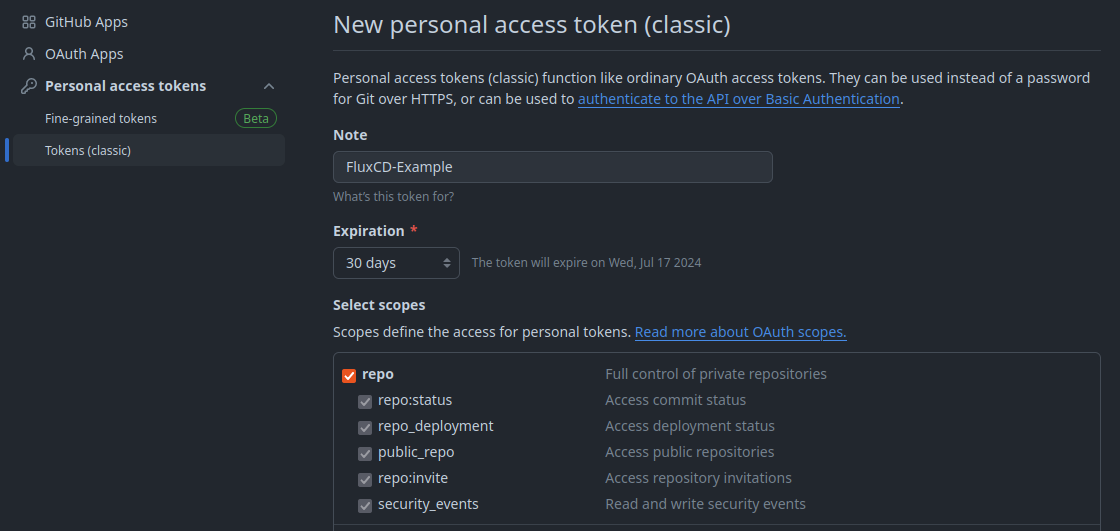
After generating the token, please make sure to copy it directly and store it somewhere safely, e.g., in your keepassxc database, because it won´t be shown anymore later on.
Export PAT and bootstrap flux
Now that you have your PAT at hand you can export it as GITHUB_TOKEN.
export GITHUB_TOKEN=<your-gh-PAT>
With that token in place the GitHub repo can be bootstrapped. The following command will create a private GitHub repo, which consists of the yaml files configuring your active kubernetes cluster/context.
So be sure your kind test cluster is active and not your current production cluster, which you might maintain from your maschine. (Which should in the future be done by flux)
When running the k9s tool you can see the active context or cluster, but also this can reveal the current context.
kubectl config current-context
Once you´re certain to apply the FluxCD bootstrapping to the right cluster, you can run the following command:
flux bootstrap github \
  --token-auth \
  --owner=SimonScholz \
  --repository=flux-cd-gitops-example \
  --branch=main \
  --path=clusters/development \
  --personal
By using the k9s tool you can now see certain default pods in the new flux-system namespace being started to let FluxCD do it´s magic.

Clone the bootstrapped repository
In my case it is a simple git clone git@github.com:SimonScholz/flux-cd-gitops-example.git
In case you have chosen the same repository name, you just need to change the owner.
Deploy a container to the cluster using FluxCD
Within the clusters/development/ folder you can add a podinfo folder, which would contain the following yaml files.
One file for declaring the source where to obtain the HelmChart from:
---
apiVersion: source.toolkit.fluxcd.io/v1
kind: HelmRepository
metadata:
  name: podinfo
  namespace: default
spec:
  interval: 10m
  url: https://stefanprodan.github.io/podinfo
And a file to declare the HelmRelease itself:
---
apiVersion: helm.toolkit.fluxcd.io/v2
kind: HelmRelease
metadata:
  name: podinfo
  namespace: default
spec:
  interval: 10m
  chart:
    spec:
      chart: podinfo
      version: '6.6.3'
      sourceRef:
        kind: HelmRepository
        name: podinfo
        namespace: default
      interval: 10m
  values:
    replicaCount: 1
When you now push these files to the remote repository Flux will grab the changes and apply it to your cluster.
While Flux is applying the changes your can run flux get all -A --status-selector ready=false to see whats happening. Also see https://fluxcd.io/flux/cheatsheets/troubleshooting/