GitHub Pages
You can create your custom GitHub Page by creating the following repository: "your-github-name".github.io, e.g., simonscholz.github.io. Once you created this repository you can simply push an index.html file or whatever webpage content you like to the master branch of the repository. This webpage will then be displayed when hitting "your-github-name".github.io, e.g., simonscholz.github.io, with your browser.
This feature is often used to provide a website for the project, which is being hosted on GitHub. But I use this for my personal homepage.
Also see https://pages.github.com/ for more information about GitHub pages.
As you might already guess, this website can be found here: https://github.com/SimonScholz/simonscholz.github.io
The source code resides in the source branch and the actual site will be automatically build once I push something to the source branch.
After that build to build result can be found in the master branch.
Steps to reproduce
Create the repository
Create a new public repository called "your-github-name".github.io and GitHub will also tell you that this repo is special.
Clone the repo and create a source branch
Go to your new repository and copy the clone url:
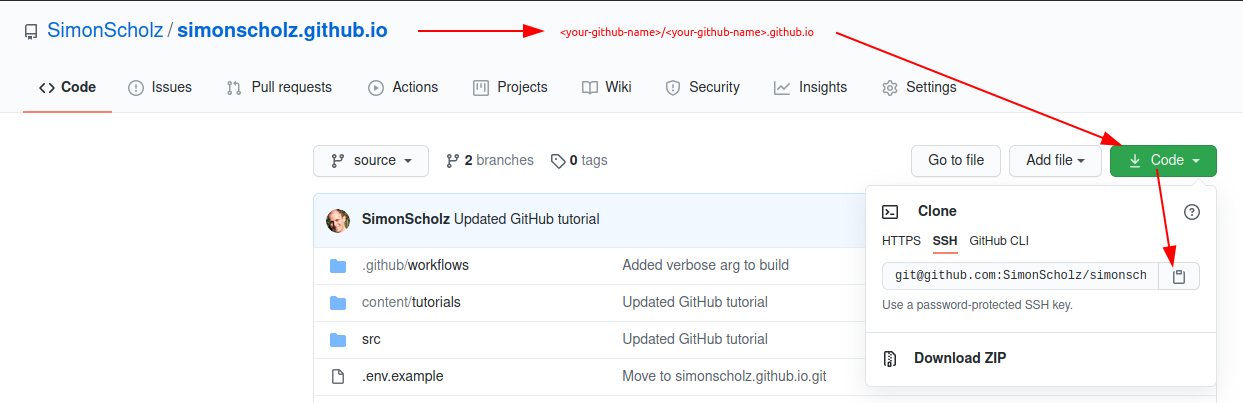
git clone git@github.com:<your-github-name>/<your-github-name>.github.io.git

e.g.

git clone git@github.com:SimonScholz/simonscholz.github.io.git
Creating the source branch works like this:
git checkout -b source
In the repository you can setup your website using gatsby.
Create a Gatsby starter project
As a quick start you can install the gatsby-cli globally by running:
npm install -g gatsby-cli

or

yarn global add gatsby-cli
This assumes that you've already installed npm or yarn.
Then in the repository folder you can create a Gatsby starter project by calling gatsby new gatsby-site https://github.com/gatsbyjs/gatsby-starter-hello-world inside your repository.
Once this is done you can call gatsby develop and navigate to http://localhost:8000 to see the page.
Feel free to modify this starter project or even build a proper page according to your needs. You'll find plenty of good docs, tutorials and examples on https://www.gatsbyjs.com/.
Github action to automatically deploy your Gatsby website
You already know that the contents of the master branch will be used as source for your GitHub Pages website.
To avoid building your Gatsby locally by using the gatsby build command and pushing the result to the master branch over and over again, you can utilize GitHub actions to automate these steps.
Therefore create a ./github/workflows folder inside the repo on the source branch, which contains a main.yml with the following contents:
# Name of the action
name: 🚀 Deploy website

# Controls when the action will run.
# In this case the actions will be run when pushing to the source branch of your repository
on:
  push:
    branches: [source]

# A workflow run is made up of one or more jobs that can run sequentially or in parallel
jobs:
  # This workflow contains a single job called "build"
  build:
    # The type of runner that the job will run on
    runs-on: ubuntu-latest

    # Steps represent a sequence of tasks that will be executed as part of the job
    steps:
      # Checks-out your repository under $GITHUB_WORKSPACE, so your job can access it
      - uses: actions/checkout@v2

      - name: Gatsby Publish
        uses: enriikke/gatsby-gh-pages-action@v2.1.1
        with:
          # A personal access token needed to push your site after it has been built.
          access-token: ${{ secrets.ACCESS_TOKEN }}
          # The branch expected by GitHub to have the static files needed for your site.
          deploy-branch: master
          # Additional arguments that get passed to `gatsby build`.
          gatsby-args: --verbose
The contents of the main.yml file runs the jobs when pushing to the source branch.
First the code of the source branch will be checked out and thanks to https://github.com/enriikke/gatsby-gh-pages-action the Gatsby website will be built and then pushed to the master branch.
Your main.yml file can also contain secret variables, like ${{ secrets.ACCESS_TOKEN }} for providing an access token.
Personal access token with push repository rights
The gatsby-gh-pages-action needs access to your repository in order to be able to push to the master branch.
Personal access tokens can be created by navigating here: https://github.com/settings/tokens or by using the UI to your accounts settings > developer settings > Personal access tokens.
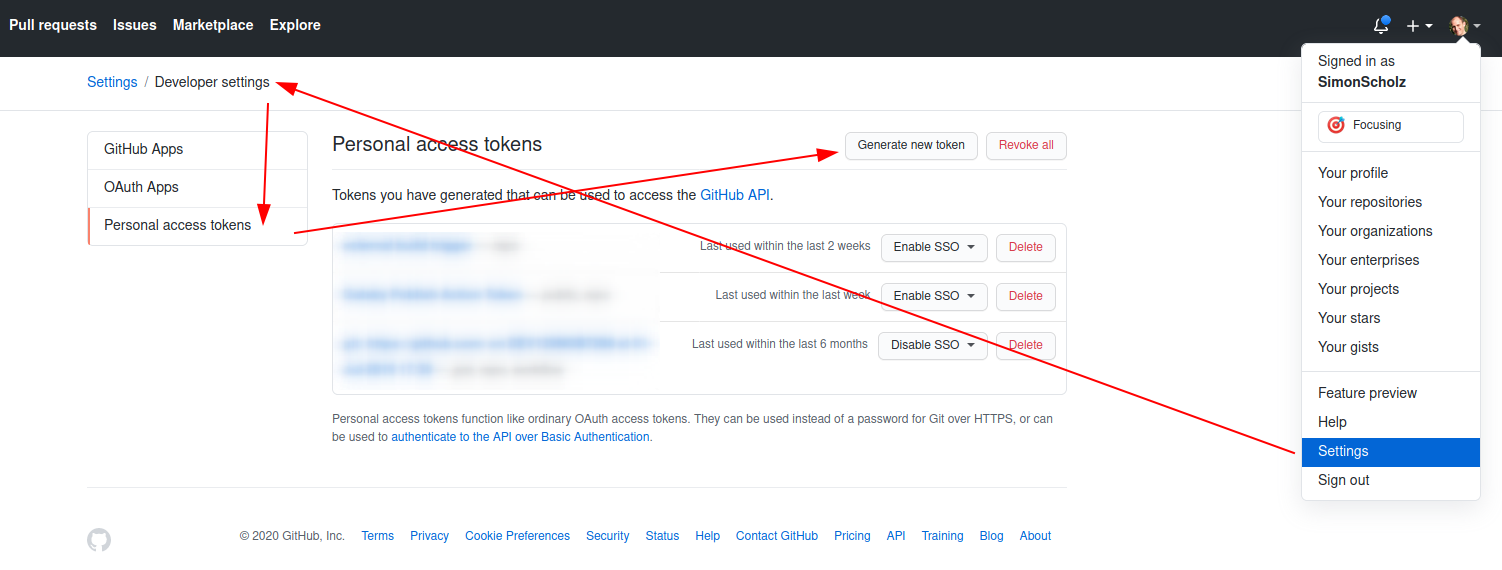
After hitting the Generate new token button you can enter a note and select proper scopes for the rights granted for the access token.
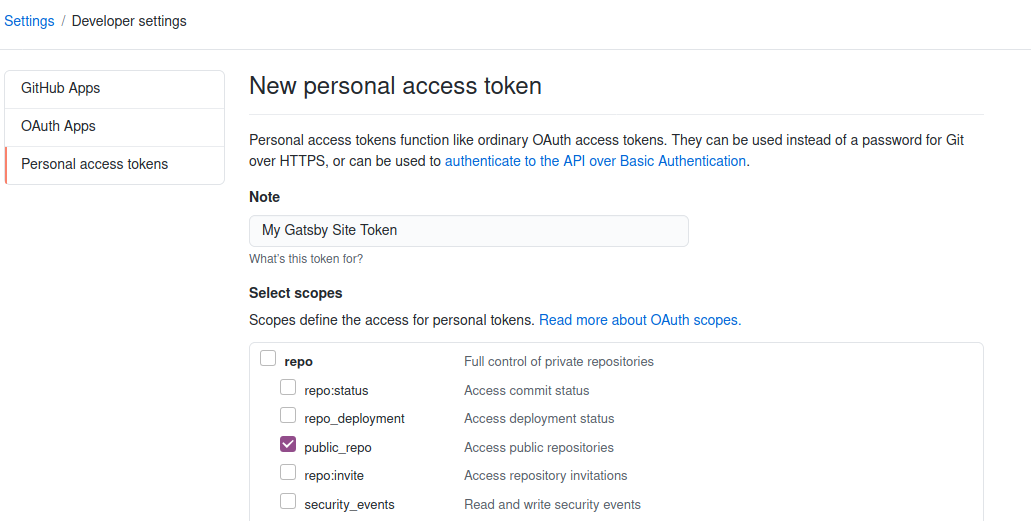
Assuming that the repo is public the public_repo scope should be sufficient.
Then just hit the Generate token button and copy the access token.
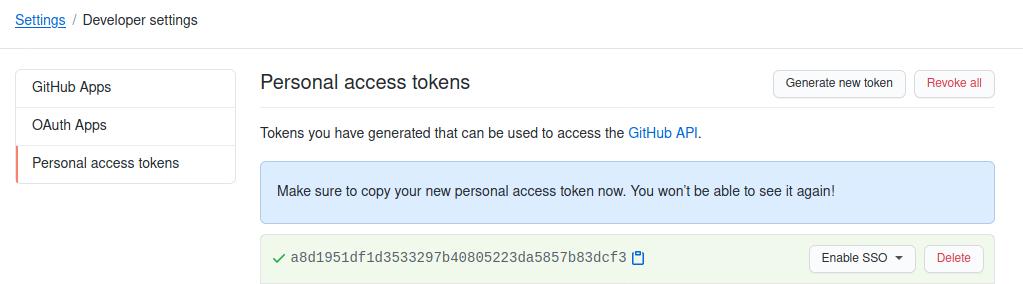
Make sure to copy this token in a save place, because you won't be able to see it any more after refreshing the page.
Using the access token in the build file
Instead of directly pasting the generated personal access token into the main.yml file, you'd rather save it securely so that nobody can make use of it.
That's where repository secrets come into play.
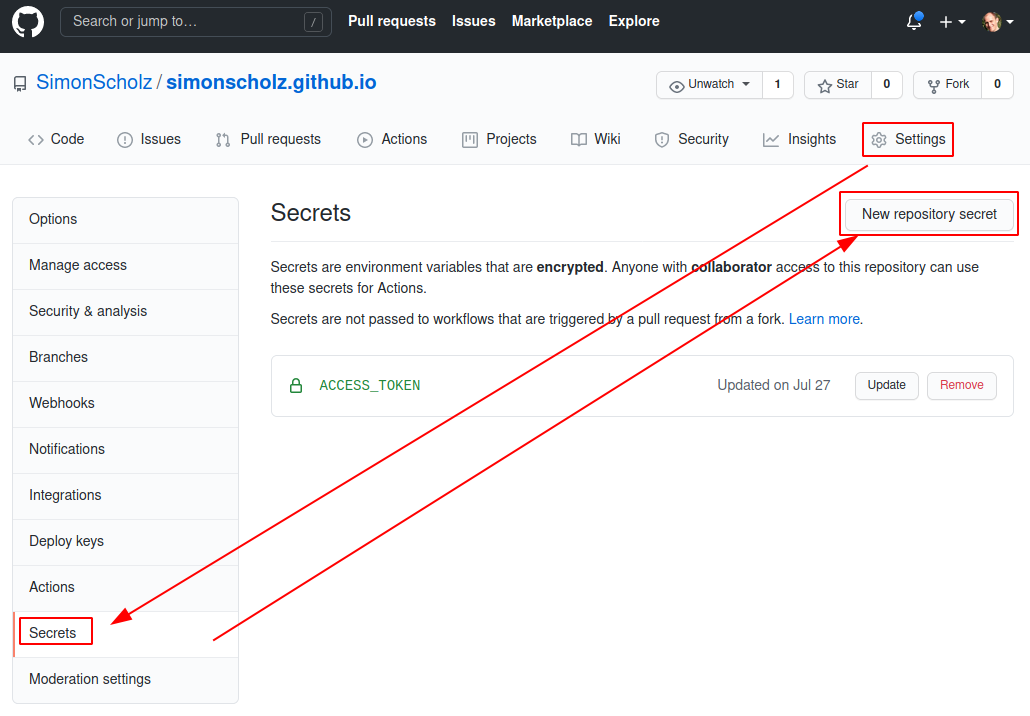
After clicking on the New repository secret button you can give the enter a name and a value.
To be compliant with the given main.yml file the name should be ACCESS_TOKEN and the value has to be the personal access token, which was generated and copied earlier.
Congrats! After all these steps your Gatsby website will be build automatically when pushing to the source branch and then be deployed to the master branch.